Existing PanoMatrix RC2 usersFirmware Upgrade
A guided upgrade path for the PanoMatrix controller. Follow the cable connection, upload procedure and the new operating behaviour in order.
Source instruction: Firmware V2.53 bilingual reference
Before you begin: preparation
- Prepare a computer: use a Windows 10 or Windows 11 PC with an available USB port.
- Prepare the supplied Cable: use the dedicated USB-C programming cable included with your PanoMatrix controller.
- Download the update files: open the Google Drive folder below and download Uploader and the Hex firmware files for V2.53.
Use a Windows 10 or Windows 11 PC and the supplied USB-C cable. The computer powers the PanoMatrix controller during the update, so the RC 2 itself does not need to be turned on.
↓ Open Google Drive to download the update files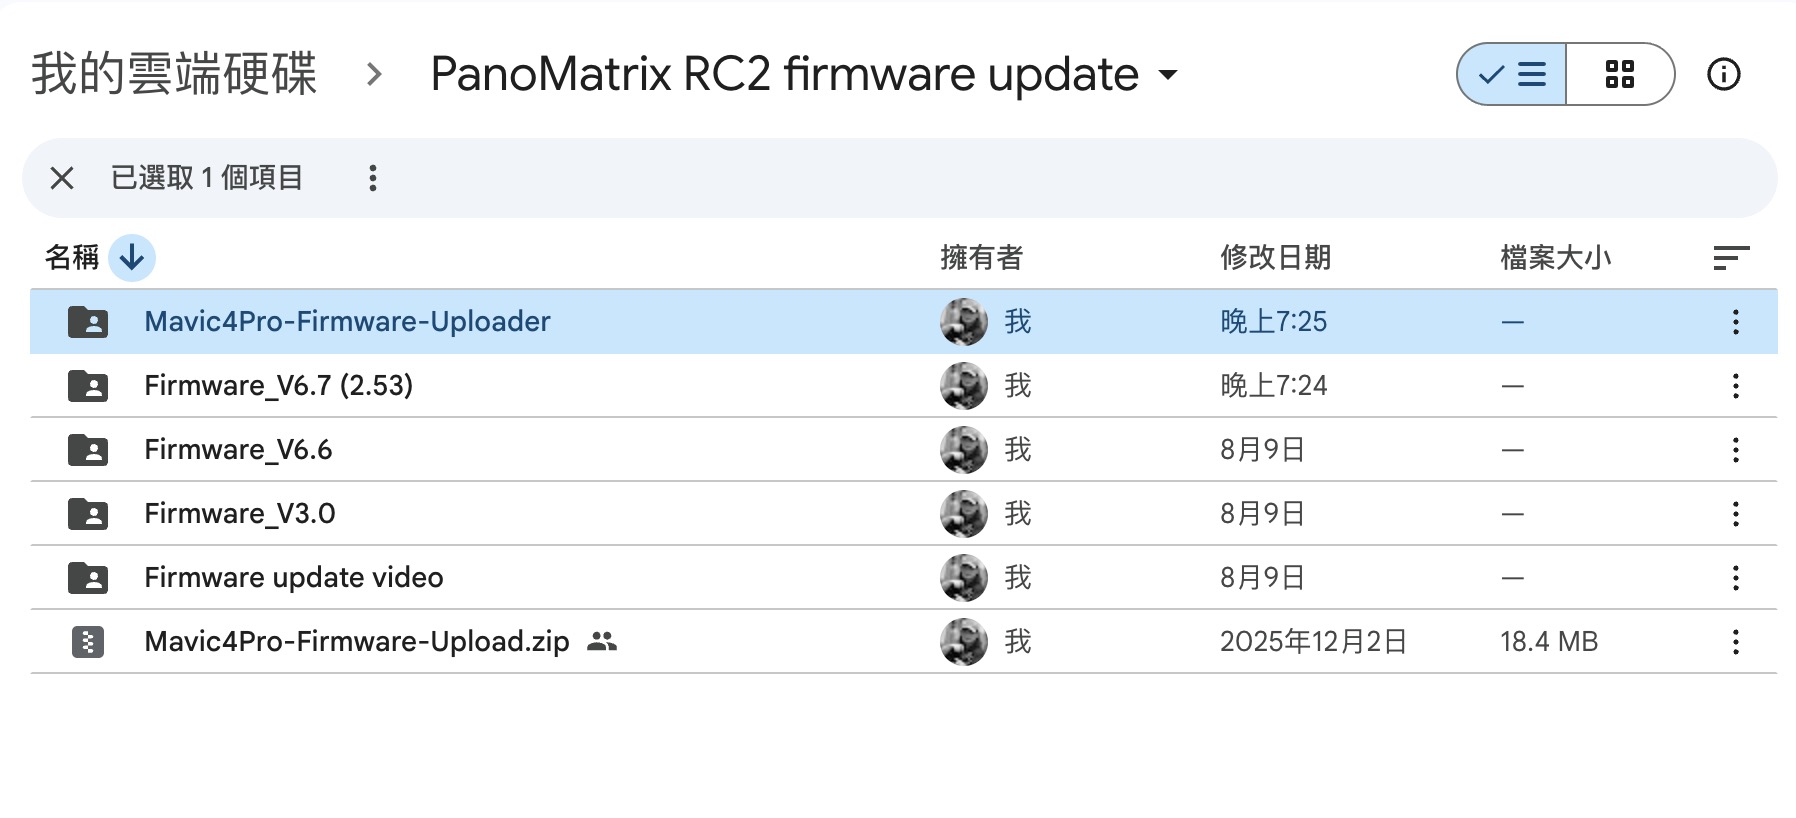 Google Drive download folder — choose the firmware folder labelled (2.53).
The folder also contains earlier firmware versions. For this guide, select the version labelled (2.53) together with Mavic4Pro-Firmware-Uploader.
2. Prepare the package
Extract the supplied ZIP package to a folder on your computer. It contains Uploader.exe, the current Hex firmware file and older firmware files for rollback when needed.
3. Upload the firmware
Open Uploader.exe and follow the four actions below. The transfer normally completes in less than 20 seconds.
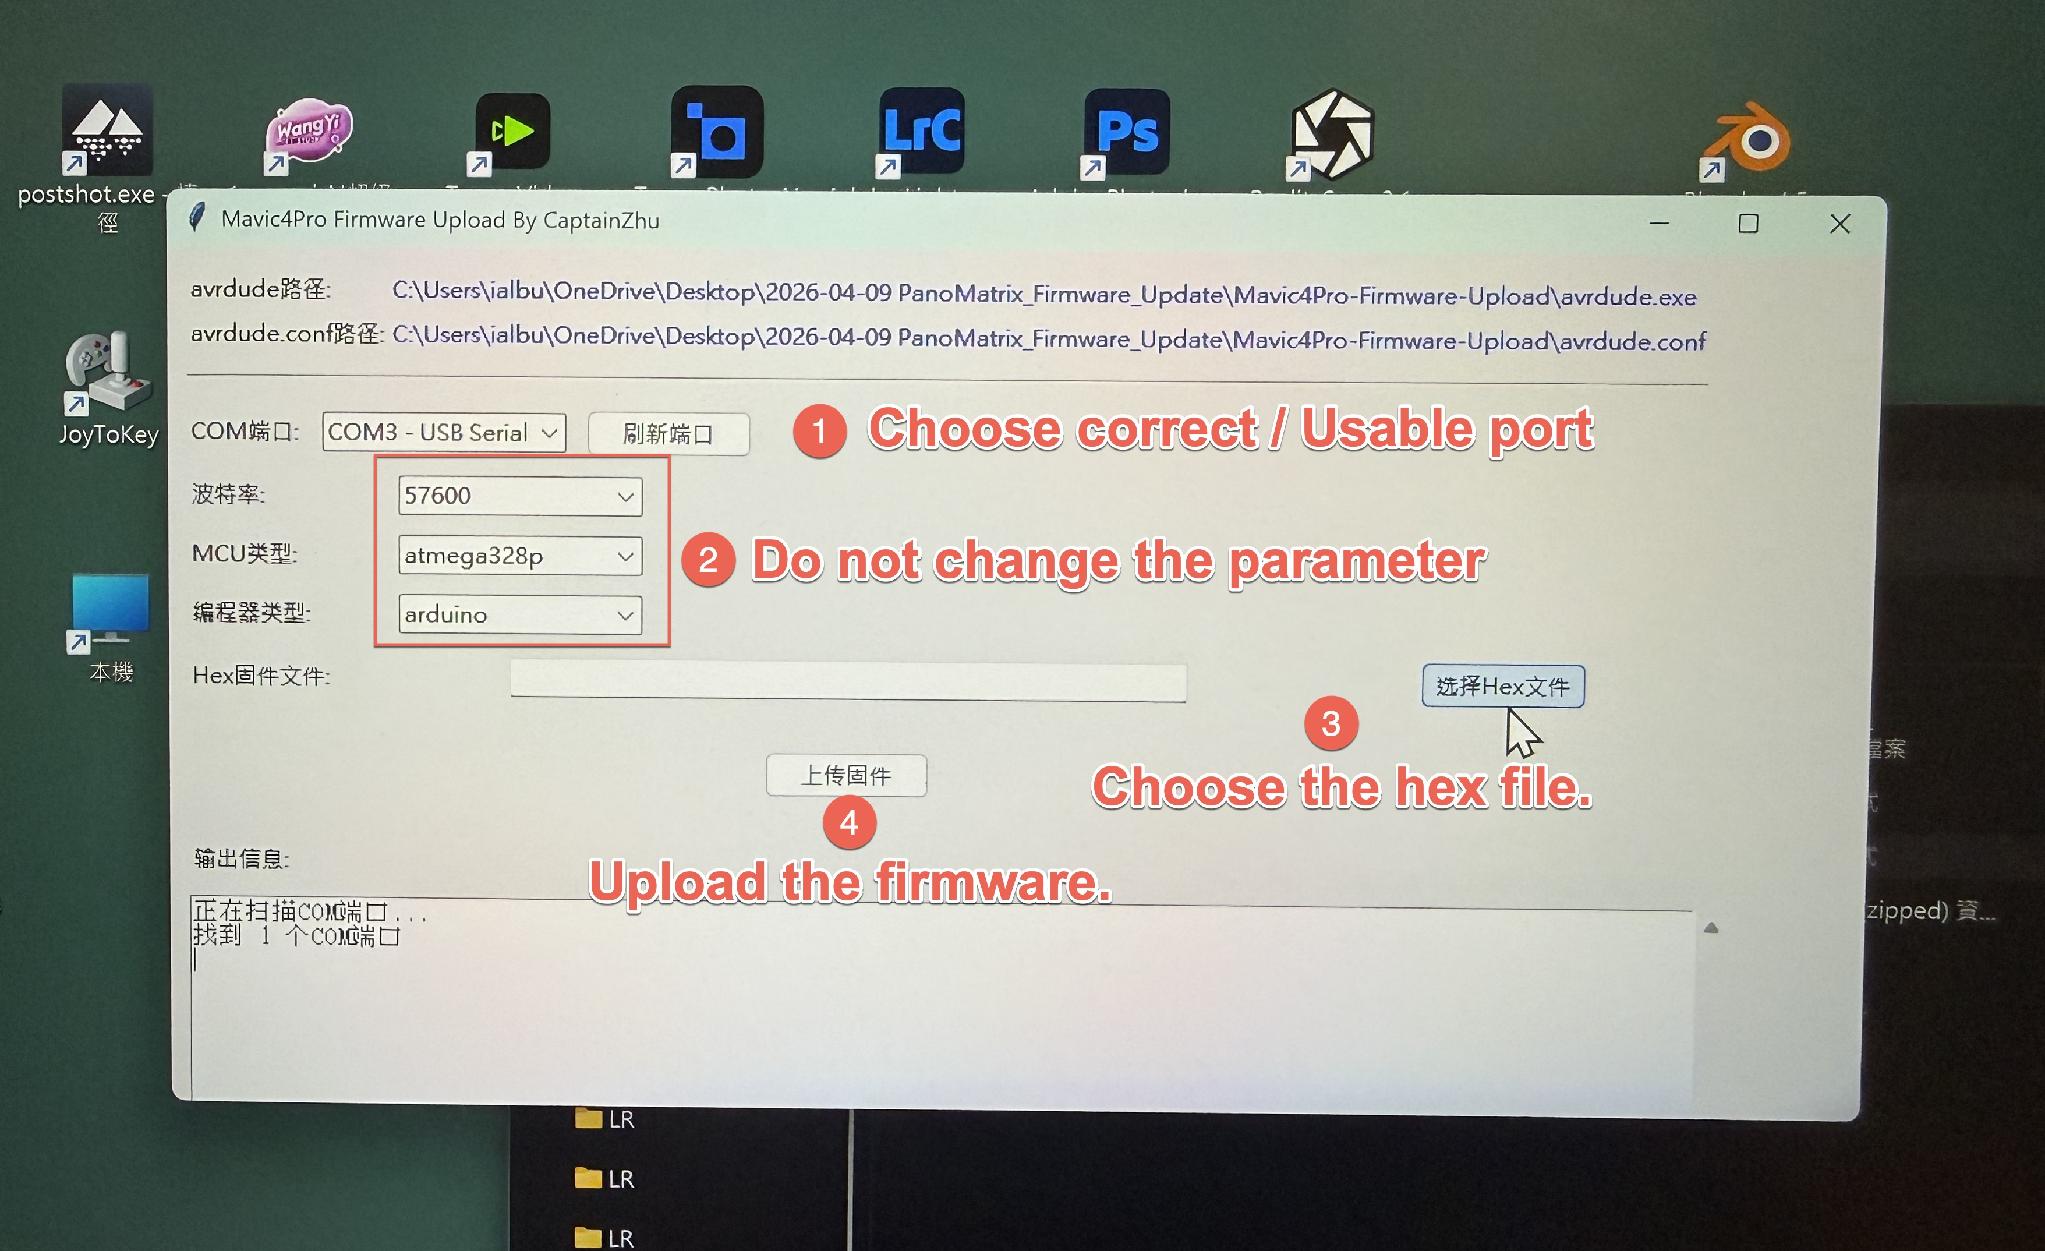 Uploader.exe interface and illustrated upload steps.
1Select the port
Choose the detected, available Port.
2Keep the defaults
Do not change baud rate 57600, MCU atmega328p or programmer arduino.
3Choose the firmware
Select the correct Hex file for the firmware version you intend to install.
4Upload
Start the upload. When the success message appears and the new firmware screen is correct, disconnect the cable.
4. What changes after the upgrade
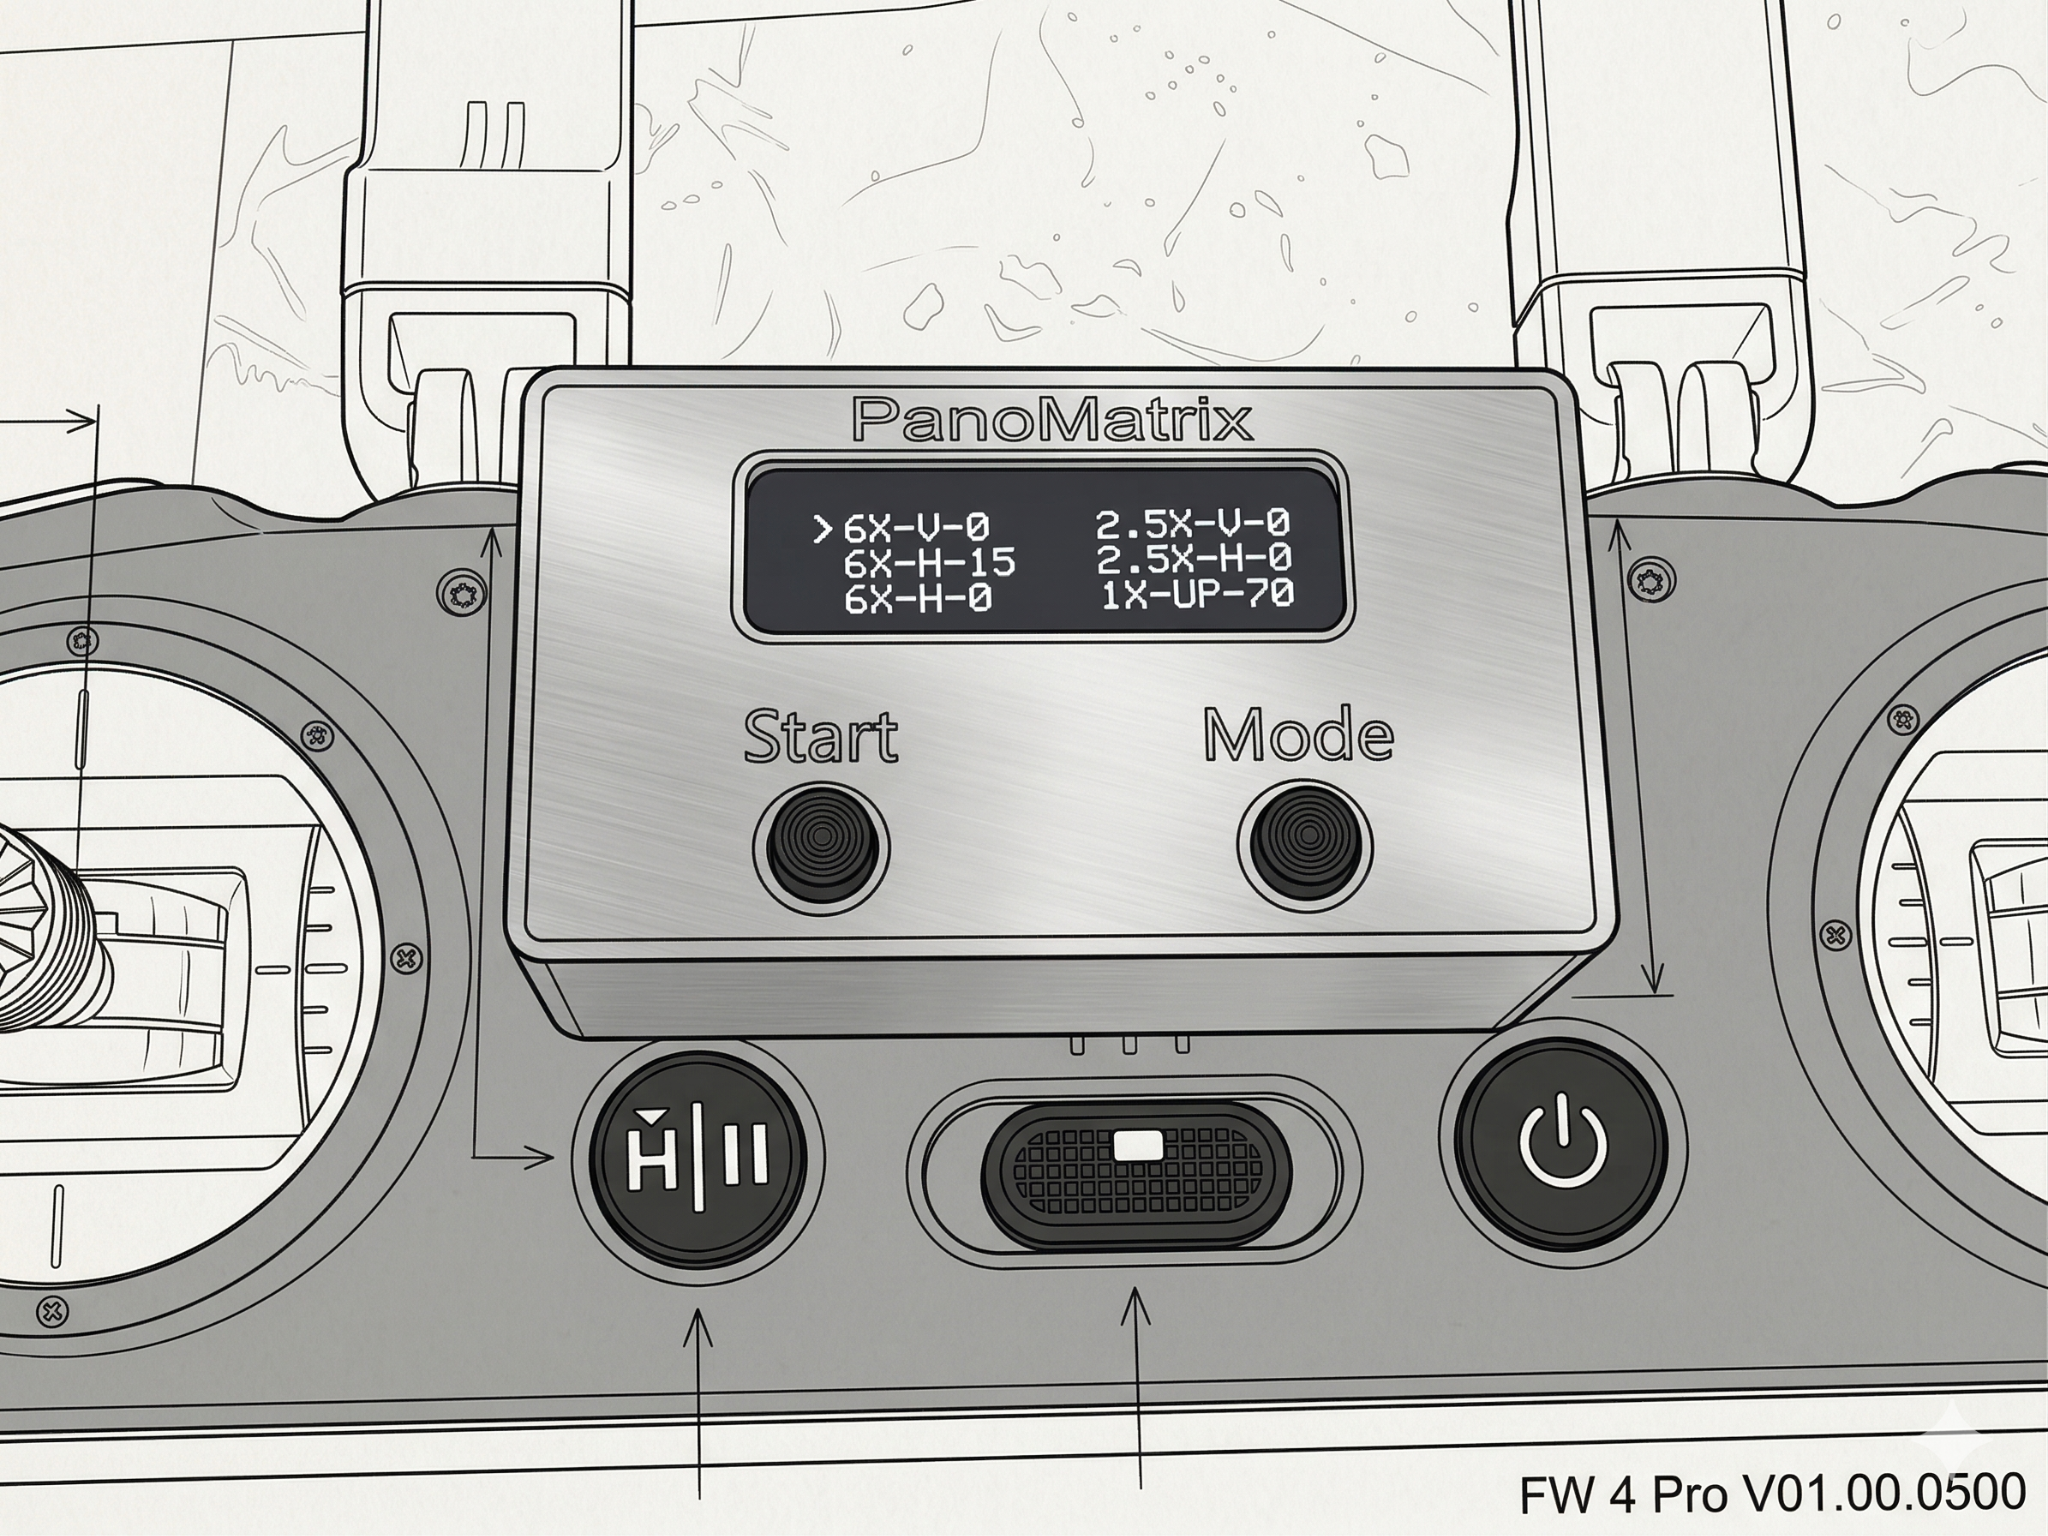
The controller LED presents a two-row menu. The first row keeps the established single-exposure programs; the second row adds AEB panorama programs.
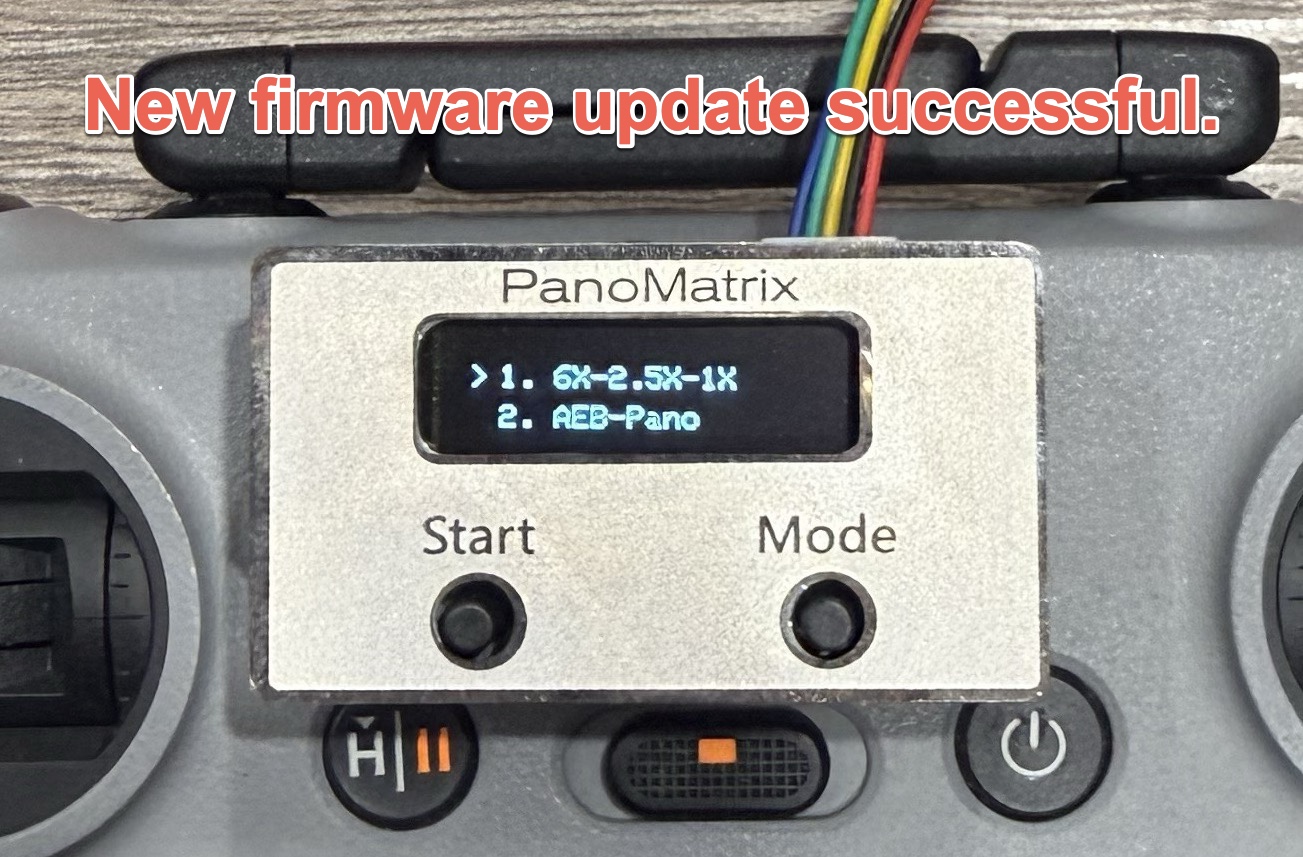 New Firmware Update Successful — Firmware V2.53
Mode 1 — Standard Exposure
Mode 1 > 1.6X-2.5X-1X is the familiar standard capture group.
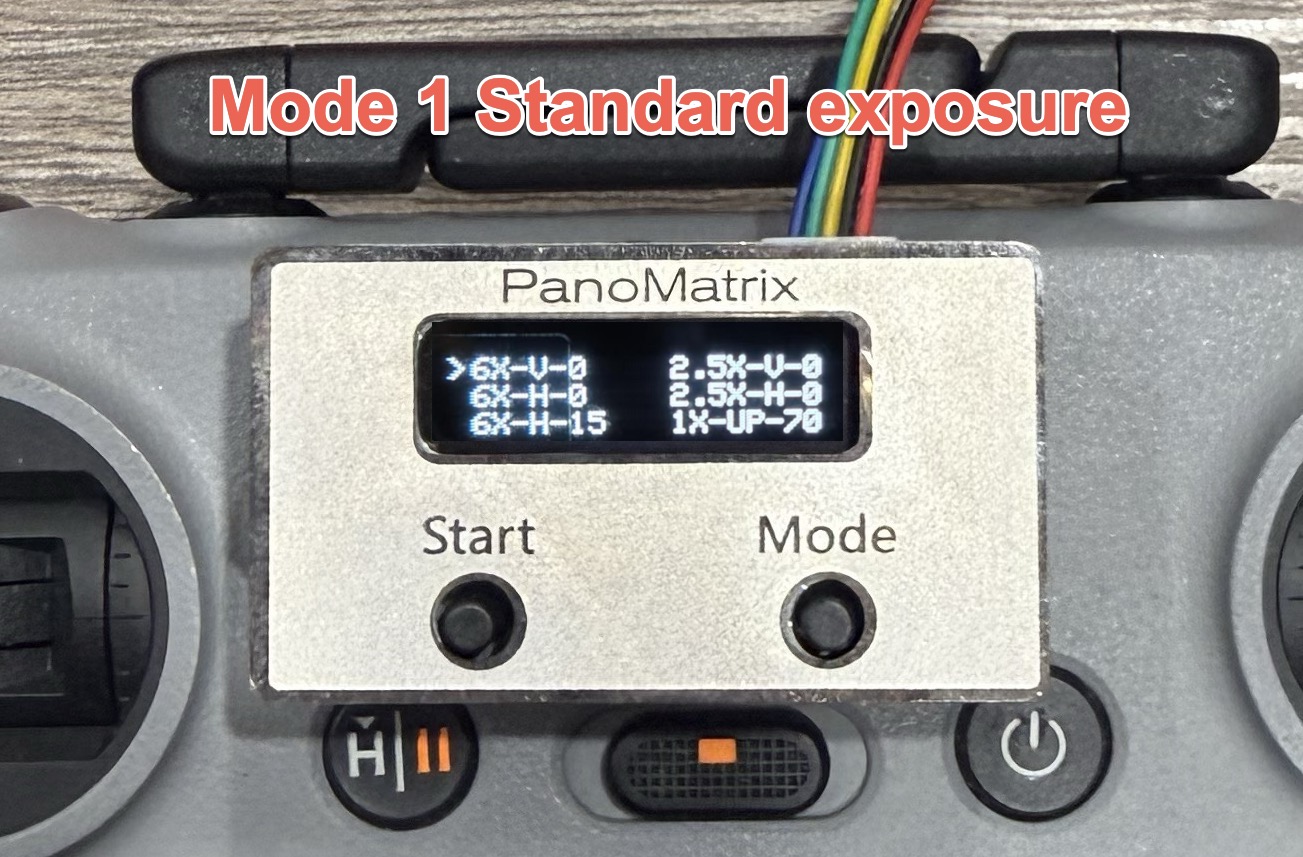 Mode 1 — Standard Exposure
Mode 2 — AEB Exposure
Mode 2 > 2.AEB-Pano adds bracketed panorama modes. Set the DJI RC 2 camera to AEB and allow enough time delay for the aircraft to write every exposure.
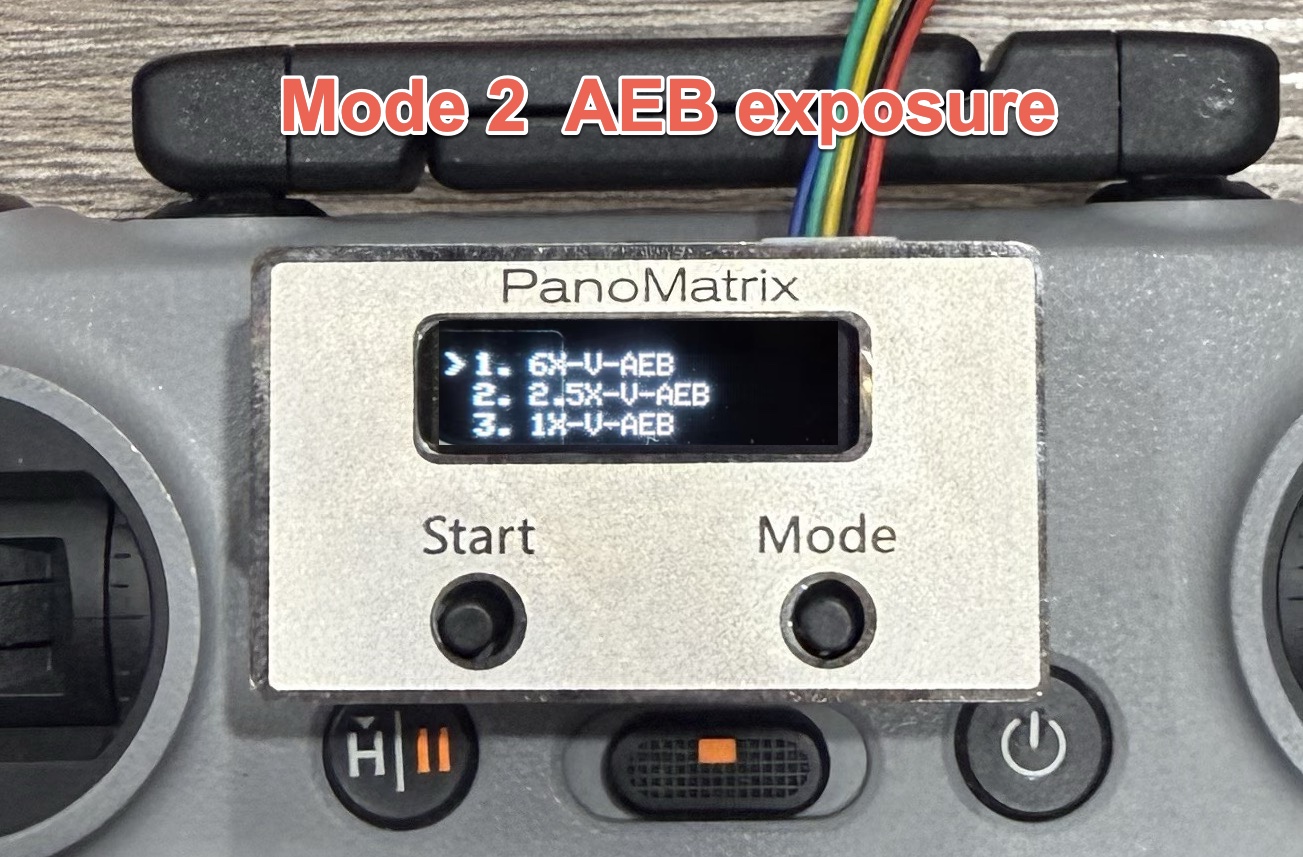 Mode 2 — AEB Exposure
5. Controls and interruption
Start is the left confirmation button. Mode is the right selection button, pause control and return-to-main-menu control.
Pause and resume
During a capture, short-press Mode once to show Pause. Short-press it again to continue from the same point.
Return to the main menu
Hold Mode for 3 seconds during a capture or submenu to stop the current process and return to the main menu. This replaces the old power-cycle reset method.
 Controls and interruption
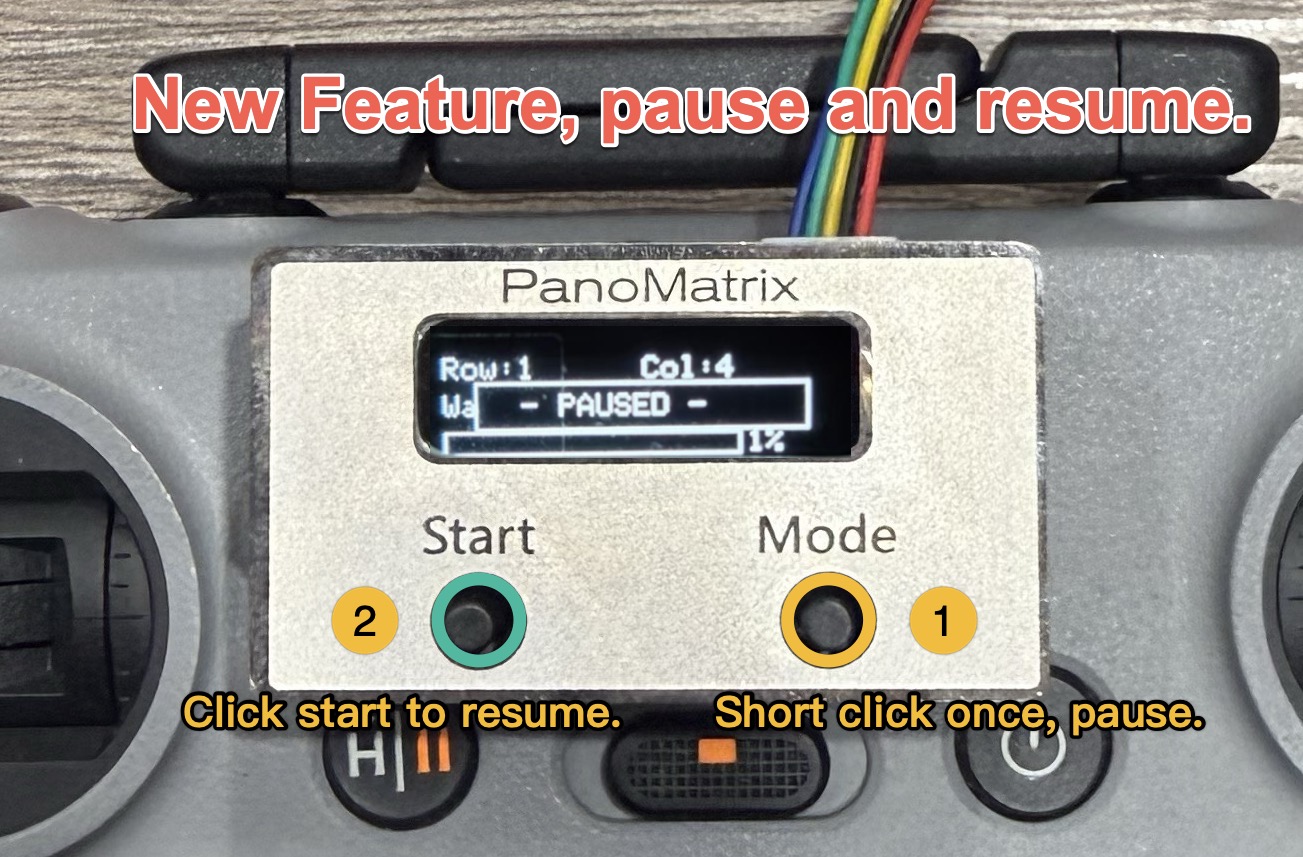 Pause and resume
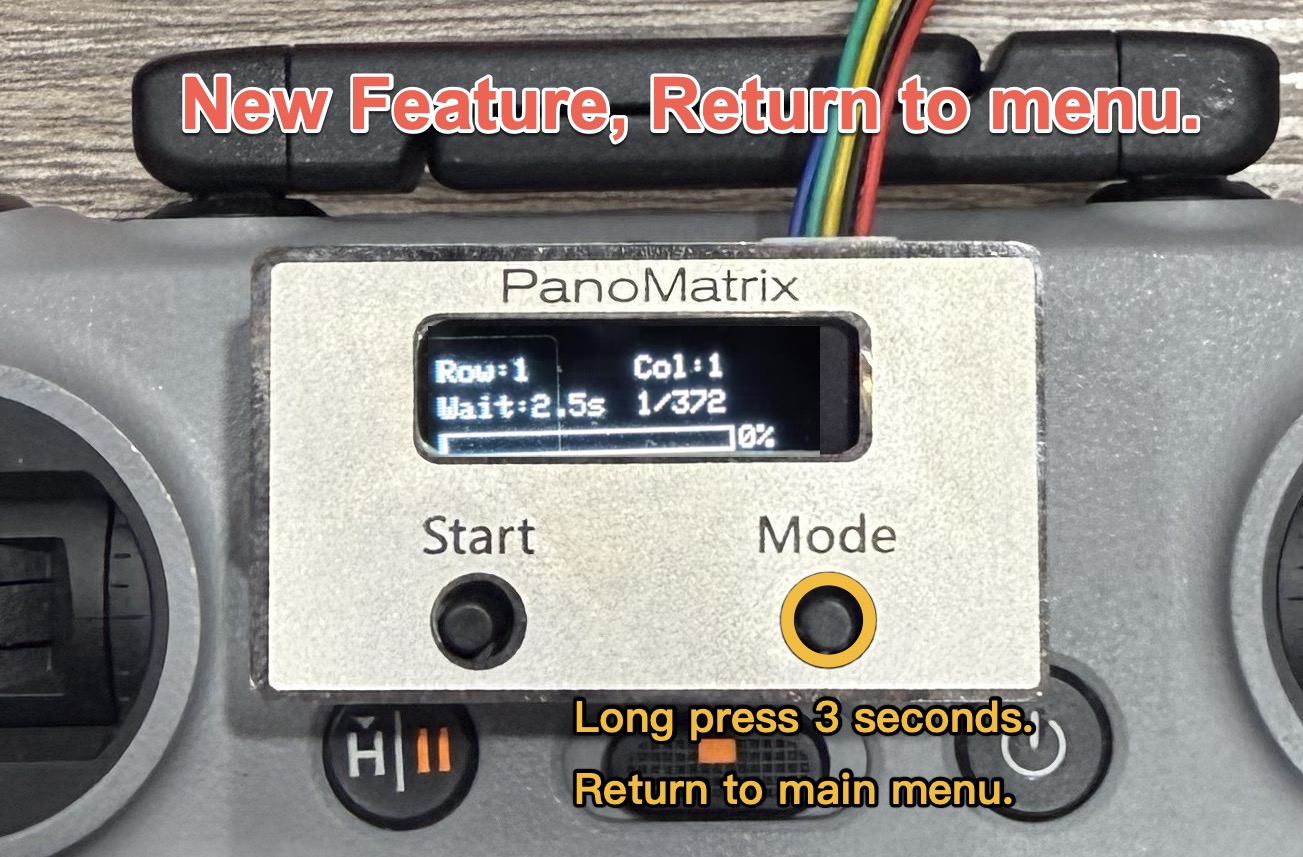 Return to the main menu
6. Standard capture programs
The original modes remain available: 6X-V-0 vertical at 0° with 36 columns; 6X-H-0 horizontal with 13 layers down; 6X-H-15 starting at +15° with 15 layers down; 2.5X-V-0; 2.5X-H-0; and 1X-UP-70, which begins at +70° and descends to the bottom.
7. AEB panorama: interval settings
Choose 6X-V-AEB, 2.5X-V-AEB or 1X-V-AEB from the second row. Press Start to open AEB Interval, use Mode to select 2–10 seconds, then press Start again to begin.
Available intervals: 2, 2.5, 3, 3.5, 4, 4.5, 5, 6, 7, 8, 9 and 10 seconds.
Recommended starting intervals for 3-shot AEB RAW
- 6X-V-AEB — 3.0 seconds
- 2.5X-V-AEB — 2.5 seconds
- 1X-V-AEB — 7 seconds
- Test the actual interval before a formal shoot. Each mode keeps its interval value, but changing the AEB shot count requires a new interval setting.
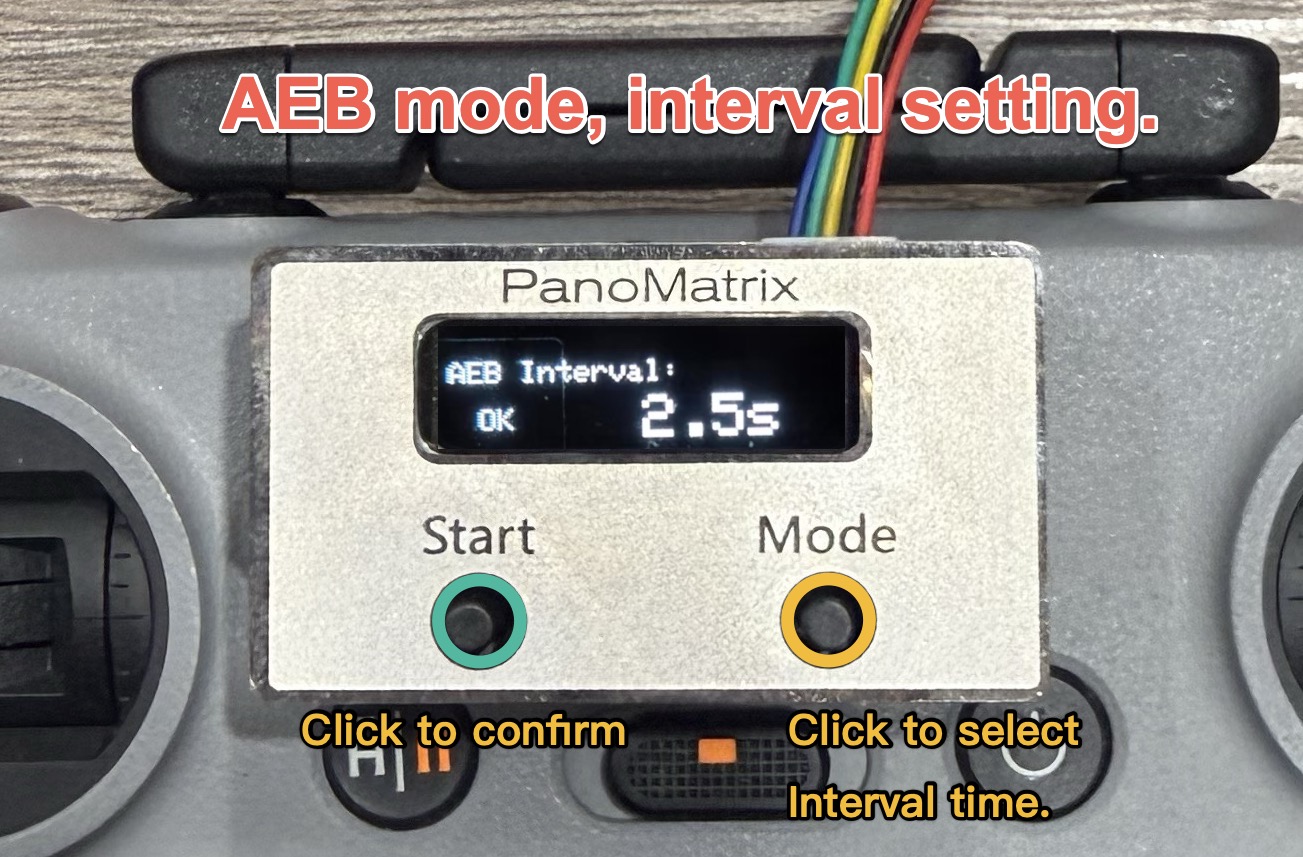 AEB panorama: interval settings
8. Capture warnings
- With 6× and 3-shot AEB RAW, the workflow is close to the system limit. One horizontal run of 372 positions can use about 75–80% of a battery.
- Start near the launch or intended capture position to reserve battery for the matrix. In altitude-limited areas, remain 5 m below the ceiling and avoid repeated limit warnings, which can interfere with triggering or saving.
9. Auto-Leveling (Centering)
Firmware V2.53 automatically establishes the gimbal's horizontal zero before every capture program: it points the camera down, then returns to the 0° horizon after about 1–2 seconds, before executing the selected program. This applies to all modes, including 1X-UP-70, whose upward starting angle is now set automatically.
10. Progress screen and support
The AEB capture screen shows the capture percentage, total frame count and current frame. When capture is complete, the controller returns to the main menu. For assistance, contact vr@super720.com.